You can do all kinds of wonderful things with text in Illustrator—and that includes curving it. You can wrap words around curved shapes, like circles or custom paths. You can even make letters themselves curved, totally changing the shape of typefaces.
And you can make the effect as subtle or as dramatic as you want. Better still, it can all be done in just a few clicks.
Curved text is great for posters, logos, and other designs where you want your typography to really stand out. Here are the best ways to do it.
1. How to Curve Letters With Illustrator's Warp Options
Illustrator comes with several built-in ways to curve text. These are generally similar to the text curving effects in Photoshop. Before you can use them, create some text, and then select it.

Now go to Effect > Warp in the menu bar, and choose any of the warp options. It doesn't matter which one, as you'll be able to change it in the next step.

This will open the Warp Options window. Enable the Preview if it isn't already, and you'll be able to see the currently selected warp effect in action.

Use the sliders to tweak the warping effect. You can set the severity of the bend, the direction, and whether it's applied more or less to certain points in your text.

Use the Style dropdown menu to select different warp effects. Experiment with these effects and sliders to bend text in just about any way you can think of.

When you're finished setting your warp options, simply click OK to apply them.
2. How to Bend Text Using Illustrator's Envelope Distort Tool
Illustrator's Warp Options panel might be all you ever need for creating curved text. But if you want to create an entirely original bent text effect, you can do it with an Envelope Mesh.
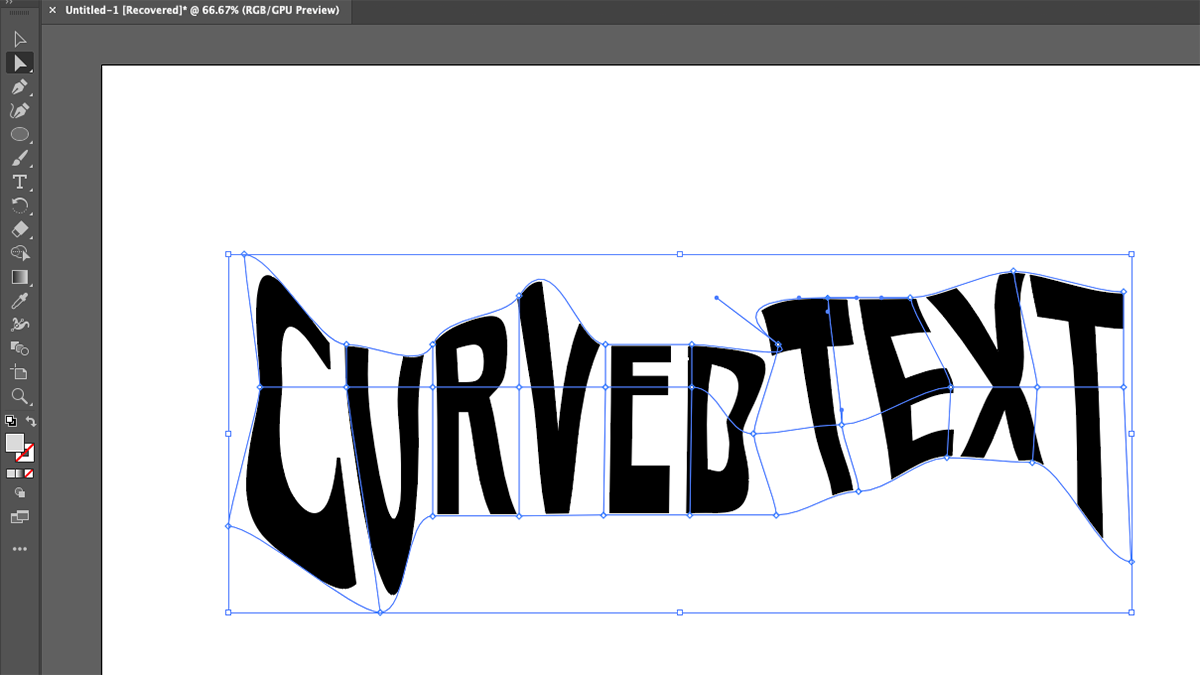
Create your text as before, but this time select Object > Envelope Distort > Make with Mesh from the menu.

You now need to set up your Envelope Mesh. You'll see a grid has been applied to your text, and you can set how many rows and columns it should have.
The more you have, the more control you'll have over how to distort your text, but the more complicated it will be. Depending on the effect you're looking for, a lower number of rows and columns may be better for your needs.

When you've set the number of rows and columns you want, click OK. With the Direct Select tool (A), double-click an anchor point to move it and distort the text. You can also use the handles to further edit the curves. To select more than one anchor point, hold down Shift while clicking them.
To make changes to your mesh after you've created it, go to Object > Envelope Distort > Reset with Mesh. You can then change how many rows and columns your mesh should have. This is good if feel like you don't have enough control using the mesh you've already created.

You can also change what the text says by selecting Object > Envelope Distort > Edit Contents from the main menu. Enter your new text, and Illustrator will curve the words according to your mesh.

3. How to Curve Text Along a Path in Illustrator
The curved text methods we've looked at so far distort the letters themselves. But you can also make text follow a curve without changing the shape of the letters. To bend text around a circle, for example, use the Ellipse tool to create a circle.

Next, click and hold the Type tool to expand it. Select the Type on a Path tool.

Now, hover over the edge of your circle. The cursor will change, and you'll see the word "path". Left-click on the edge of the circle, and you'll be able to start typing.

You can now type whatever you want, and it will follow the path of the circle. You may need to resize your text or your circle to fit everything in.

You can change where the text starts and ends by using the control brackets on the path. Using the Selection tool (V), hover over the one in the middle, and you'll notice that the cursor changes.

Click and drag this bracket to change the position of the curved text on the path.

You can even flip it to the other side of the path if you want. To avoid that happening, hold Ctrl (Cmd on Mac) while you're dragging the bracket.

You aren't limited to curving text around a circle. You can also apply the Type on Path tool to a custom path created with the Pen tool. Just draw the path and use the same process you used with the circle.

You can even create a custom shape with the Shape Builder tool for this purpose. Shapes are one of the fundamental ways to use Illustrator effectively.
Start by creating your shape.

Then, when you use the Type on Path tool, Illustrator will remove the fill and stroke, leaving you to type whatever you want along the outline.

4. Combining Curved Text Effects
Each of these methods for creating curved text in Illustrator has its own pros and cons. But there's no reason why you have to pick just one of them. In fact, you could combine one or even all of them.
You might, for instance, arch text around a circle, then apply an Arc warp effect in Warp Options. Then, you could finish it off by tweaking the effect further using an Envelope Mesh.

You can also stack Warp Options. Just apply an effect as normal, and then go back into Warp Options and apply another one. You can do this as many times as you want, enabling you to create whole new effects.
When to Apply Curved Text Effects in Illustrator
Using the methods in this article, you can do some radical text curving in Illustrator. However, that doesn't necessarily mean you should. Unless you really want to create something strange, you should generally avoid making text unreadable in your designs.
You should pick and choose which techniques to use and why to apply them. If you're unsure about the best ways to use curved text, it's worth reading more about typography in general and getting to grips with best practices.
Choose the right curved text effects, though, and it can make a huge difference in your work. As always, you should experiment to find the results that suit your project.
Comments
Post a Comment