Need more than one operating system on your Raspberry Pi? Several tools are available that help manage the process, such as the Raspberry Pi Foundation's own NOOBS, and its forerunner BerryBoot.
NOOBS is considered by many to be the superior installer, but it misses a few of BerryBoot's options. Interested in trying out BerryBoot to dual boot your Raspberry Pi 3 or 4? Read on!
What Does BerryBoot Do?
Ever had trouble installing an ISO disk image file to your Raspberry Pi's SD card? Want more than one OS (perhaps a retro gaming system and a media center)? The answer is a tool that helps to manage the installation of one or more OSs for your Pi.
That's basically what BerryBoot does. Presenting you with a selection of operating systems to choose from, BerryBoot downloads the OSs and installs them, with minimal interaction from you.
It also provides you with some basic network tools, location settings, and even an editor to adjust the configuration. You might, for example, want to edit your network settings in wpa_supplicant.conf. or you may prefer to change the boot menu timeout in cmdline.txt.
Using BerryBoot is straightforward:
- Download BerryBoot.
- Extract ZIP file to a formatted SD card.
- Configure BerryBoot.
- Select and install one or more operating systems.
- Choose which OS you wish to use each time you boot your Raspberry Pi.
BerryBoot also makes it possible to install your chosen Raspberry Pi operating systems to a location other than the SD card. If you have network attached storage (NAS), or a hard disk drive (HDD) connected to your Pi, these can be used. This is a great way to reduce data writing on your SD card, and prolong its lifespan.
The SD card will need to remain in the Pi to boot from, however.
How to Get BerryBoot and Dual Boot Your Raspberry Pi
To use BerryBoot, you'll need to download it from Sourceforge. This is an online repository where many applications and utilities are hosted.
BerryBoot is available in one of two downloads. The first option is for all versions of the Raspberry Pi, from the original and the Raspberry Pi Zero through to the Pi 3B+. If you have a Raspberry Pi 4, however, there is a dedicated version available---yes, you can dual boot a Raspberry Pi 4.
Download: Berryboot
Copy BerryBoot to a Formatted SD Card
Once downloaded, the contents of the ZIP file will need to be extracted and copied to your Pi's SD card.
- Start by inserting the SD card into your PC
- Browse to the downloaded ZIP file in your file manager
- Right-click and select Extract all
- In the dialogue box that follows, click Browse
- Select the drive letter than matches your SD card, then click Extract
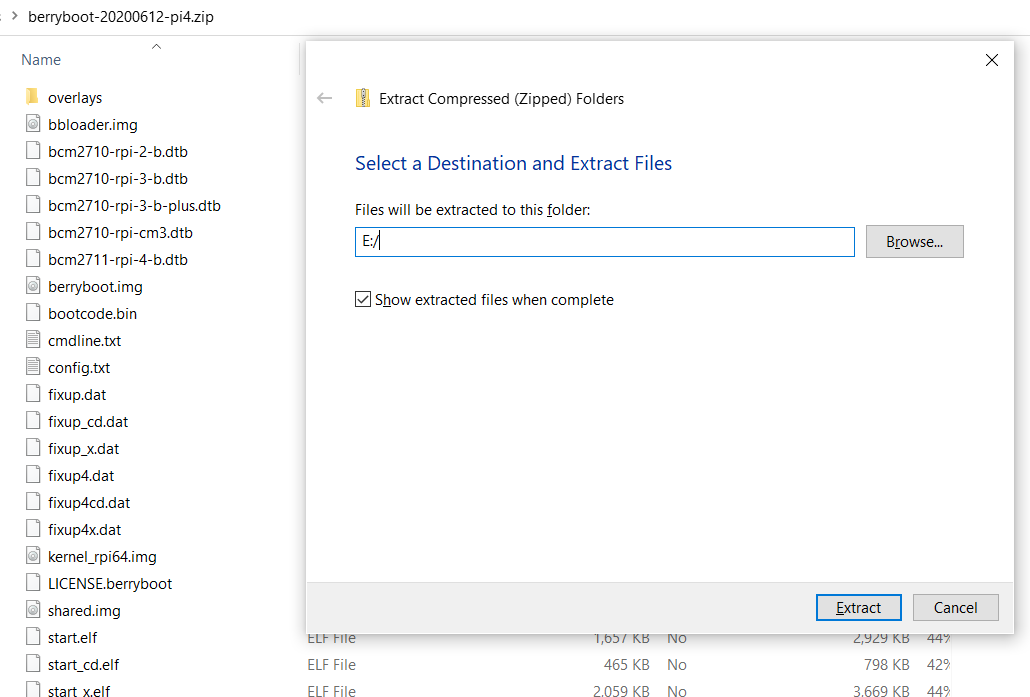
Wait while the data is copied, then ensure that the files are copied to the root of the SD card. If they're copied into a directory, the card won't boot. When you're confident the data is correctly copied, safely remove the SD card from your computer.
The next step is simple. Insert the SD card into your Raspberry Pi and power it up. Make sure you have a keyboard and/or mouse attached. You'll need one or both to select your operating systems.
Configure BerryBoot for Raspberry Pi Multiboot
On your Raspberry Pi's display, you'll initially be presented with a quick configuration screen. The first section, Video, establishes the type of TV you're using. If you can see green borders at the top and bottom of the screen, select Yes (disable overscan). Otherwise, select No.
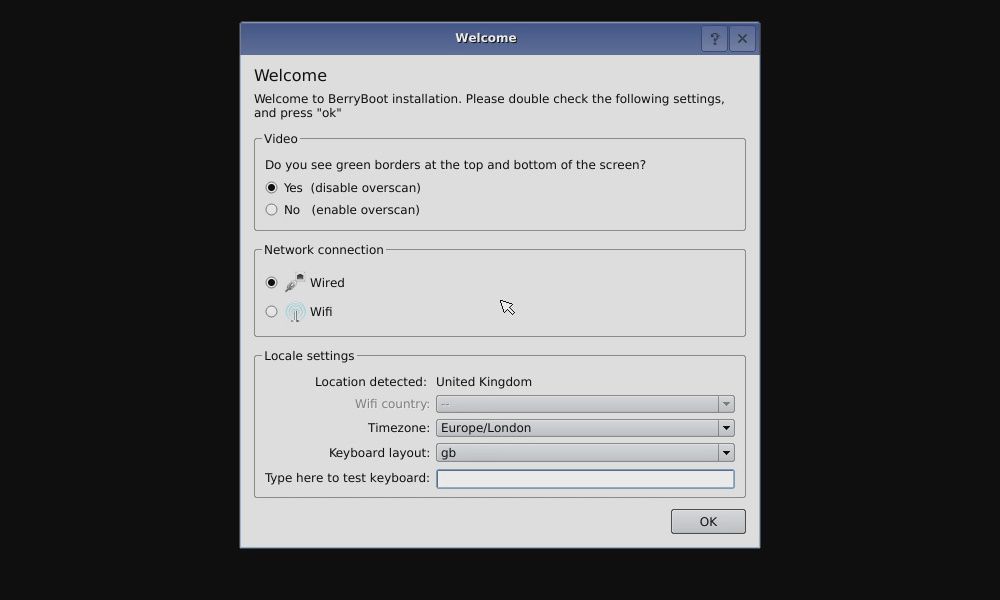
Next, specify the correct type of Network connection. If an Ethernet cable is connected, choose Cabled. Otherwise, select WiFi, then find your network's SSID in the list an input the password.
Finally, ensure the correct Timezone and Keyboard layout are selected under Locale settings. This will ensure that BerryBoot is able to access the server and download your choice of operating system.
Click OK when you're done.
Install Dual or Multiboot Raspberry Pi Operating Systems
The next prompt invites you to select a destination for the operating system(s) you're about to install.
You'll always have the choice of the local SD card, typically labelled mmcblk0. But if you have a NAS box, a USB drive, or both, you'll also see the options for those.
A USB drive is always labelled sda. The NAS will appear as Networked storage.
With the choice made, click Format (if necessary) and proceed. Leave the file system as the default ext4 option---you probably won't be using the drive with any other devices.
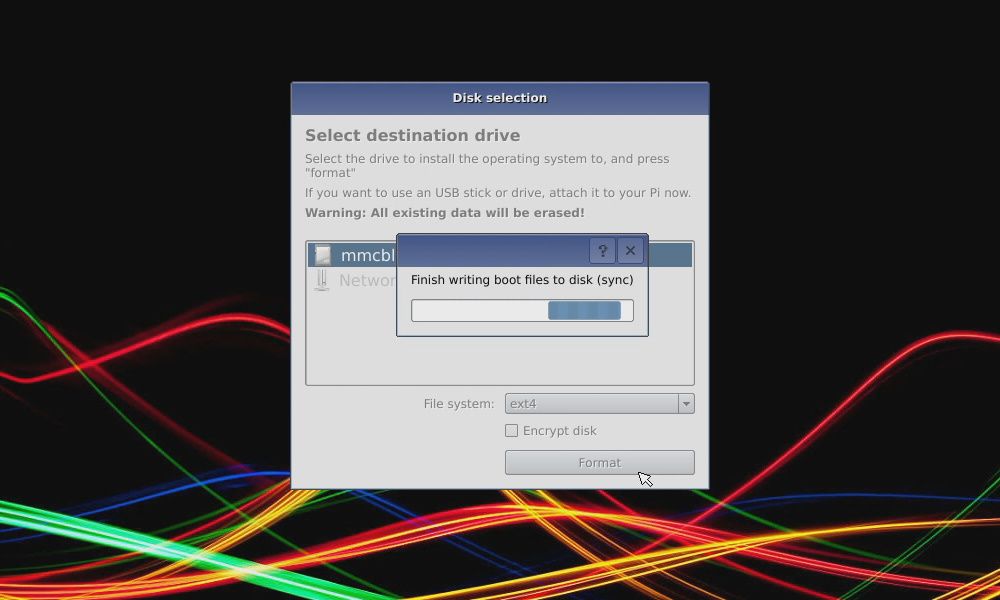
Note that when formatting, any existing files on the disk will be deleted. If you're installing to the microSD card, the space aside from the active boot partition will be formatted.
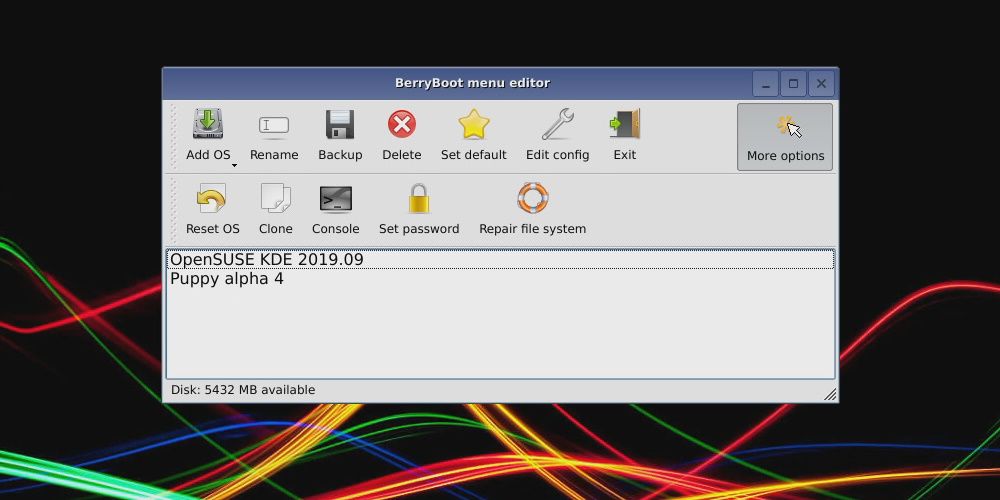
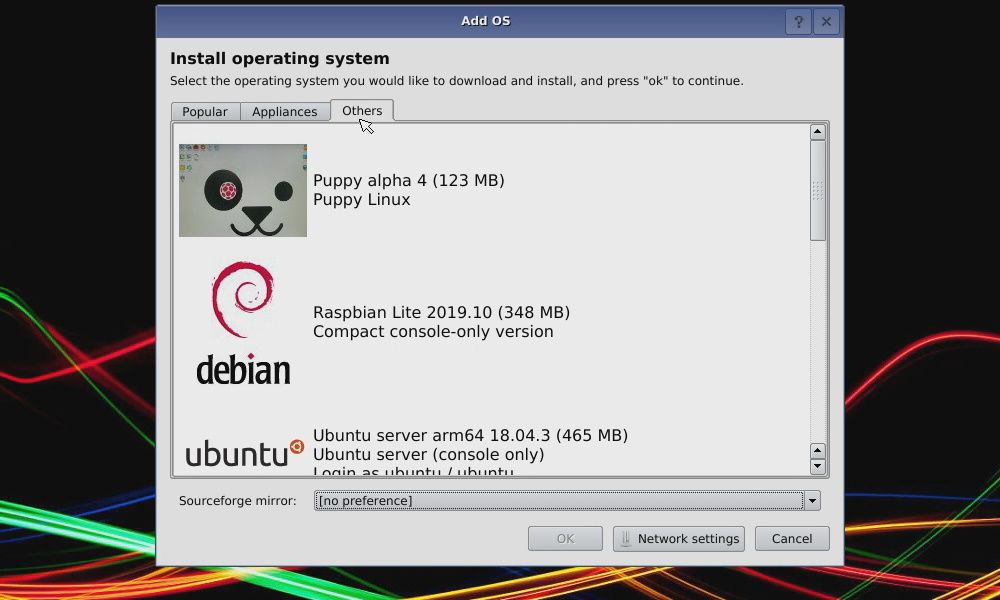
Once complete, the BerryBoot menu editor is displayed. You'll see various operation systems grouped into tabs by category. Spend a few moments to see what's on offer.
At this stage you can only install one operating system. Once this has been added and the system rebooted, further OSs can be added.
Select the OS, then OK to install. The image file will be downloaded and written to the microSD card. Wait for the system to boot, then at the boot menu click Edit.
You can now install as many additional operating systems as you need---just make sure your storage media doesn't fill up. The numbers in the bottom left corner will display how much space is left on the destination device. Too many operating systems will fill the disk, so keep it down to two or three.
To install an operating system:
- Click Add OS to browse for an operating system
- Check the box for the OSs you want
- Click OK when you're done
- Select the OS you wish to Set default, which will boot when your Raspberry Pi powers up
- Click Exit to download and install the chosen operating systems.
This may take a while depending on which operating systems you chose, and how many.
Other Advanced Options for BerryBoot
Note that Berryboot offers further menu options for your set up. For instance, the Clone option creates a copy of the selected operating system.
Meanwhile, Backup lets you create backups of single operating systems (or all installed OSs) to a different storage device. You can also use Delete to remove an OS.
One setting you may have overlooked is Advanced configuration, accessed via the chevrons on the right of menu.
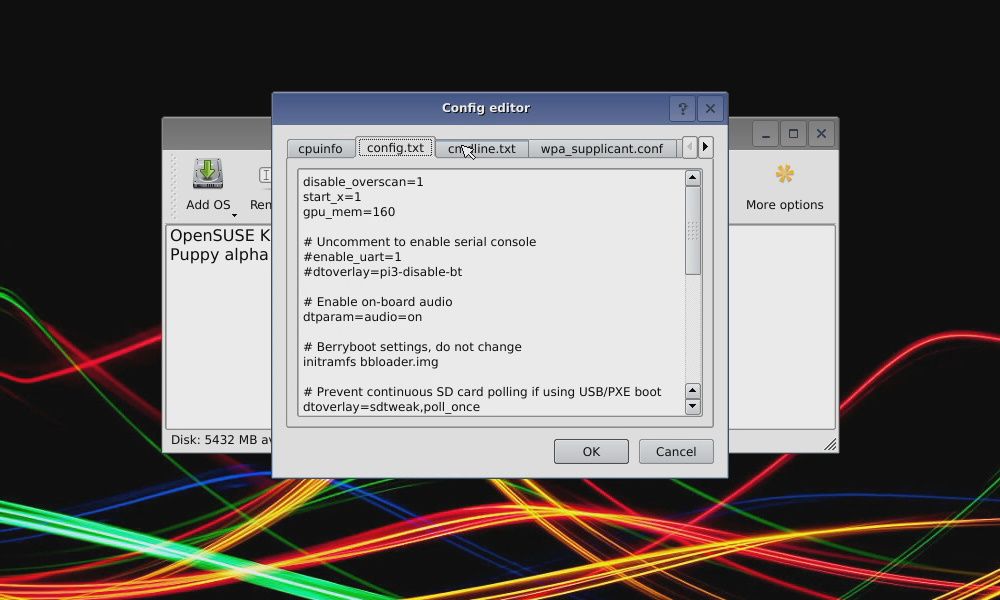
Here, you can edit the cmdline.txt and config.txt files (as well as the Wi-Fi configuration file, wpa_supplicant.conf). In cmdline.txt, for example, you can edit the bootmenutimeout property, specifying how many seconds should pass before the default OS is loaded.
bootmenutimeout=<number of seconds>Also available in the Advanced configuration menu is a Console, while Set password lets you protect installations. Filesystem problems can be fixed with Repair filesystem. This should also run automatically if the file system is damaged (perhaps following a power outage).
Dual Booting Your Raspberry Pi With BerryBoot
With your operating systems installed, the Raspberry Pi will reboot and present you with a boot screen. As noted, the default option will load automatically after 10 seconds. You can make a manual selection using your keyboard or mouse.
Moments later, you'll be enjoying your chosen Raspberry Pi operating system. Want to use a different one? Simply use the restart option and choose again at the boot menu!
Comments
Post a Comment