As mobile phone displays are much tougher than they used to be, it seems like they’re indestructible. Sadly, they’re not. Dropping your phone can often break the display. Your phone can no longer be considered useful.
Want to replace a damaged smartphone display? It’s a relatively cheap and straightforward process. Here’s how to do it.
The Costs of Replacing Your Phone Screen

Cracked your mobile phone display? Dropped it in the street, or crushed it playing football? Sat on it, even? You know by now that you’ve given yourself a headache. Can the phone be repaired, and if so, what are the costs?
Many services available online and locally will repair your mobile phone, for a price. But if you have access to the parts and they’re inexpensive, why not perform the procedure yourself?
You should also consider the non-monetary costs: time spent without a phone, data that needs archiving from the device. Hopefully your mobile platform’s cloud service can help here, or perhaps a desktop utility can check the phone’s contents.
Fitting a new display that costs the same as a replacement phone is pointless. However, if replacing the mobile phone screen is closer to $15, it makes sense to have a go yourself.
Where to Find a Replacement Phone Screen

The most obvious location for a replacement display is eBay. Simply searching for the mobile phone model and the word display will turn up the required parts. Just remember to shop safely when using eBay.
In my case, “nexus 5 display” returned a wealth of accurate (and, sadly, slightly inaccurate) results. Take the time to check that the component you choose is genuinely for your device. Often, components may appear in the results thanks to a poorly written listing.
Amazon is also a resource for replacement screens, but you should also consider a general Google search as this will turn up specialist suppliers who might be able to provide a lower price.
Note that you may find listings that offer just the display, versus listings with half the phone’s chassis. Which one you buy depends on how complicated you want things to get. For example, just the display means melting the adhesive using a heatgun or hairdryer.
Alternatively, a replacement display kit that includes half the phone’s body will require components being transferred from the old body into the replacement.
The Tools for Replacing Your Phone Screen
Often, replacement displays ship with the tools included. Typically, you’ll receive:
- Mini screwdrivers
- Mini Torx drivers
- Plastic tweezers
- Plastic wedges
- A guitar pick/plectrum
You should also have:
- Curved tweezers
- Precision knife or craft scalpel
- Hairdryer or heat gun
These tools are included to remove the case and unscrew any components that obstruct replacing the display. For example, a mobile phone will have Torx screws under the battery cover that will need removing before you gently prize the case apart.
Note that spending money on these tools isn’t totally necessary. Sanding off the ends of a couple of plastic bicycle wheel levers will produce usable alternatives—otherwise, they can be sourced relatively cheaply.
The Basics of Replacing a Phone Screen
There are so many different mobile phone models on the market (either new or used) that providing a standardized guide is next to impossible. Additionally, some models cannot be repaired without sending them back to the manufacturer.
Head to YouTube to check how your particular phone’s display can be replaced. You’ll find many detailed device-specific guides on the procedure.
Most smartphones are essentially made up of several layers of components. Each layer must be carefully detached for the glass display to be replaced.
These guides typically follow this procedure for replacing your smartphone display:
- Open the phone
- Remove the display
- Replace the adhesive
- Fit the new display
- Ensure correct cable connection
Read on to learn how to fit a replacement smartphone display.
Step 1: Open the Phone
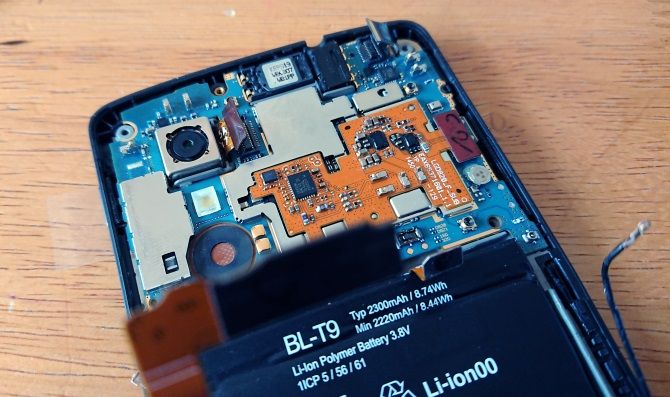
To begin, remove (where possible) the rear cover, battery and identify where the Torx (or standard) screws might be hidden. Look under labels and beside USB ports. You might find screws in the battery cavity if you have a device with a removable cell.
Prize the phone apart using the levers and plectrum; additional screws will need removing, too.

Watch out for ribbon cables, which require careful unlatching from their connectors. Use a flat plastic blade or plectrum for this.

These are often threaded through the different layers of hardware within the phone. Ribbon cables are delicate; easily broken, take care as damage to these could change the dynamic of the repair considerably.
Step 2: Remove the Screen
By now you should have the front of the phone in your hand, empty, with the glass display ready to remove. Soften the adhesive with the heat gun.
Alternatively, you can leave the phone in a warm place (such as on a radiator) for a while.
Persuading your phone’s display to part with the body isn’t usually difficult. Pushing through the camera hole against the glass to begin with, slowly prize the glass display away from the body.
As noted, some replacements are basically half a phone.
In this case, you won’t need to remove the display, but you will need to remove components (and even the motherboard) from the damaged device into the new body.
Step 3: Replace the Adhesive
Narrow rolls of replacement adhesive can be bought online. Have some double-sided sticky tape laying around? Cut this into narrow 1 mm slivers, then apply the adhesive to the phone’s frame, rather than the glass.
Step 4: Install the New Screen
Once the adhesive is in place remove the protective strips on the adhesive and push the glass into place.
Apply light pressure where the display meets the adhesive. Take care not to put pressure on the middle of the glass display. Excessive force can break even the strongest Gorilla glass.
Step 5: Ensure Correct Cable Connections
It’s now time to put the phone back together.
Reconnect the relevant cables, locking them down where necessary. Place the components back in the case with care, checking that there are no cables or screws left over. Test the phone to check that it works.
You should be able to switch the phone on without securing the final screws in order to check functionality.
Planning to use a video guide? Review it before you start to familiarize yourself with the steps.
Does the New Phone Screen Work?
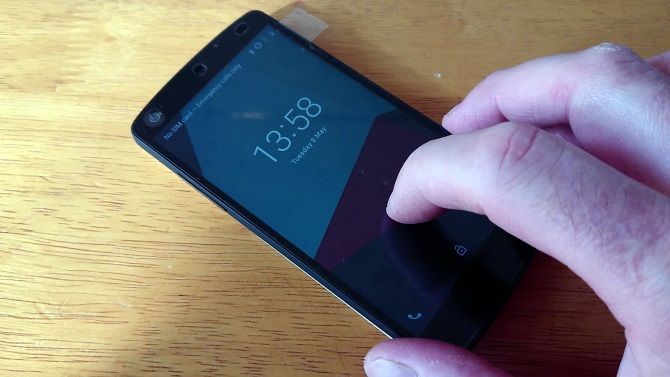
The moment of truth: does the new screen work? Remember, a touchscreen display has two purposes: touch interaction, and displaying the phone’s operating system.
A successful replacement will give your phone a fresh “almost new” look, and if the touchscreen works, well done.
However, it isn’t always plain sailing. I’ve fitted a replacement display that caused the phone to overheat. Therefore, it is important to buy components from reputable sellers, and ensure you’re buying the right parts for your phone.
DIY Smartphone Repair, Success!
Confident? Replacing a mobile phone screen isn’t simple, but it is something that you should certainly consider if the price is right.
While there are no hard-and-fast rules—devices differ from manufacturer to manufacturer—the steps provided should illustrate what is entailed.
Most importantly, don’t walk into performing such a repair without some device-specific research first. Video guides are particularly useful; once you’re ready, get hold of the right tools and surprise yourself!
Here’s another tech problem you can solve yourself with a bit of time and effort: phone display flickering.
Read the full article: How to Replace a Damaged Phone Screen Display
Comments
Post a Comment